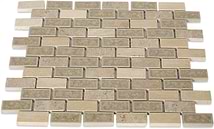
Emperial Roman Desert Tan 1x2 Brick Glass Tile
All samples ship for FREE when you order 5 samples or more! Samples typically ship within 1-3 business days.
For all regular priced non-sample orders, get fast, low-cost shipping, whether you're ordering one, one hundred, or one million square feet of tile. When you order from TileBar, you're ordering from the source. Most products are in stock in our NJ warehouse and ready to ship to your doorstep. Orders typically ship within 2-5 business days. Need it sooner? Expedited shipping options may be available at checkout.
* Additional charges apply for shipping to AK, HI, PR and the U.S. Virgin Islands.Charges may also apply to hard-to-reach areas such as military bases and locations only accessible via ferry. These charges will be assessed after your order is processed, and you will be contacted to provide payment for said charges. We will ship your order shortly after we receive payment from you.
Larger orders and delicate material, including most orders of porcelain tiles, may need to be shipped via freight carriers. The freight company may contact you to set up a delivery appointment. These orders will normally include curbside delivery only.
Did you order too many tiles, or were you not 100% satisfied with your purchase? No problem. TileBar is happy to accept returns within 180 days of your order. Please read the following information carefully.
1. You must request an RMA (Return Merchandise Authorization) form by emailing returns@tilebar.com.
2. Samples, clearance, FINAL SALE items, and custom orders are non-refundable.
3. In order for us to continue to be able to offer affordable pricing, a 15% restocking fee is assessed on all returns. Shipping charges are non-refundable. Customer are responsible for return shipping charges and arrangements.
4. All returns must be in their original packaging and in the condition in which they were received.
* Click here for more details.
Key Specs
- Chip Size 1" x 1"
- Color Beige & Cream
- Commercial Wall Only
- Residential Wall Only
- Tile Finish Polished

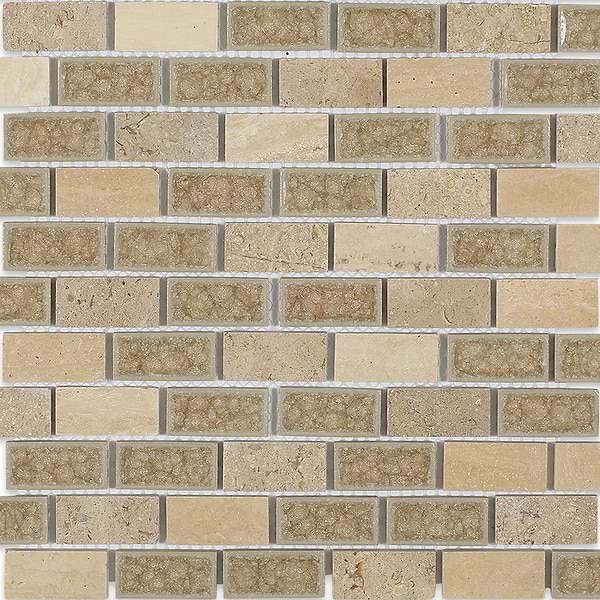
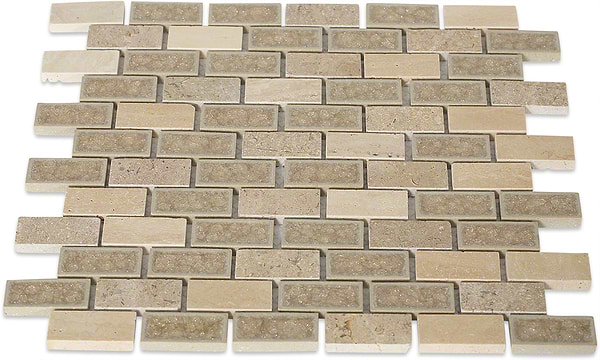

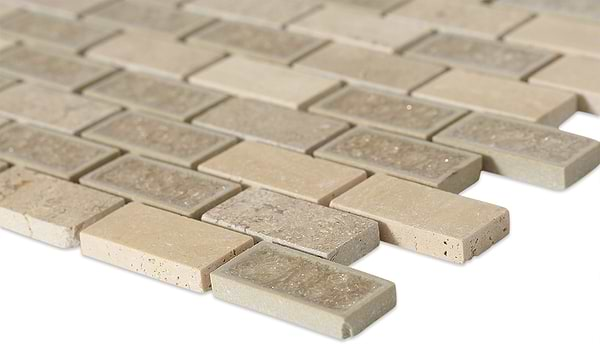
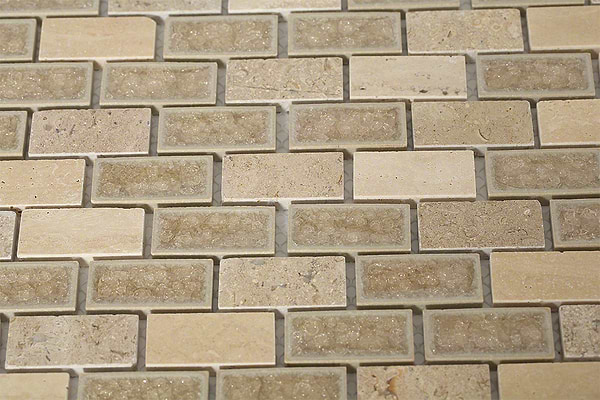
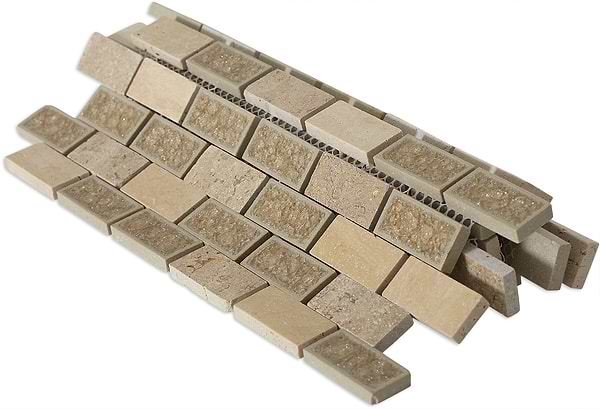
Roman Collection Desert Tan 1x2 Glass Tile
This gorgeous mosaic blend, composed of rich Travertine marble & crushed glass, is hand pressed and hand filled. Each glass chip is hand pressed and then filled with colored crushed glass chips to create an intensely faceted surface that will capture and reflect light, making it look like a thousand tiny glimmering diamonds. Great to use as a backsplash, accent wall in bathroom or any decorated spot within your home.
Recommended for You
-
$43.95 sq. ft.
-
$16.99 $16.99 sq. ft.