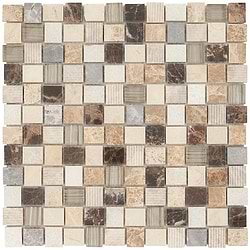
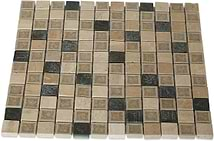
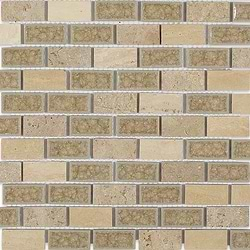
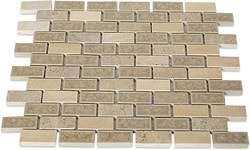
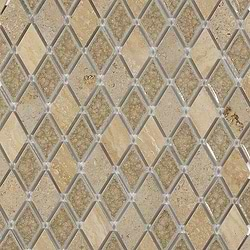
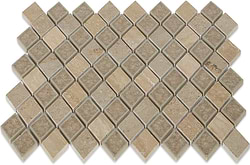
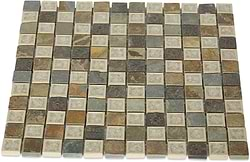
Emperial Roman Desert Tan Deco 1x1 Glass Tile
$8.99 / sq. ft.
$19.50
Loading...
All samples ship for FREE when you order 5 samples or more! Samples typically ship within 1-3 business days.
For all regular priced non-sample orders, get fast, flat-rate shipping. Standard Shipping orders ship in 7-10 business days. Expedited Shipping orders placed before 2pm EST Monday-Thursday or Friday by 10:30am ship the same day. VIP Freight typically ships in 1-2 business days. Ordering from TileBar means you're ordering from the source. Most products are in stock in our warehouses and ready to ship to your doorstep. Our fast shipping means you should expect to receive your order within 7-10 days. Need it sooner? Expedited shipping options are available at checkout.
* Flat rate shipping does not apply to closeouts, specially priced orders, slabs or scrap lots. Additional charges apply for shipping to AK, HI, PR and the U.S. Virgin Islands.
* Click here for more details.
Did you order too many tiles, or not 100% satisfied with your purchase? No problem. TileBar is happy to accept returns within 365 days of your order. Please read the following information carefully.
1. You must request an RMA (Return Merchandise Authorization) form by emailing [email protected].
2. Samples, clearance, FINAL SALE items, and custom orders are non-refundable.
3. In order for us to continue to be able to offer affordable pricing, a 15% restocking fee is assessed on all returns. Shipping charges are non-refundable. Customer are responsible for return shipping charges and arrangements.
4. All returns must be in their original packaging and in the condition in which they were received.
* Click here for more details.
Key Specs
- Chip Size 1" x 1"
- Color Beige & Cream
- Commercial Wall Only
- Residential Wall Only
- Tile Finish Polished

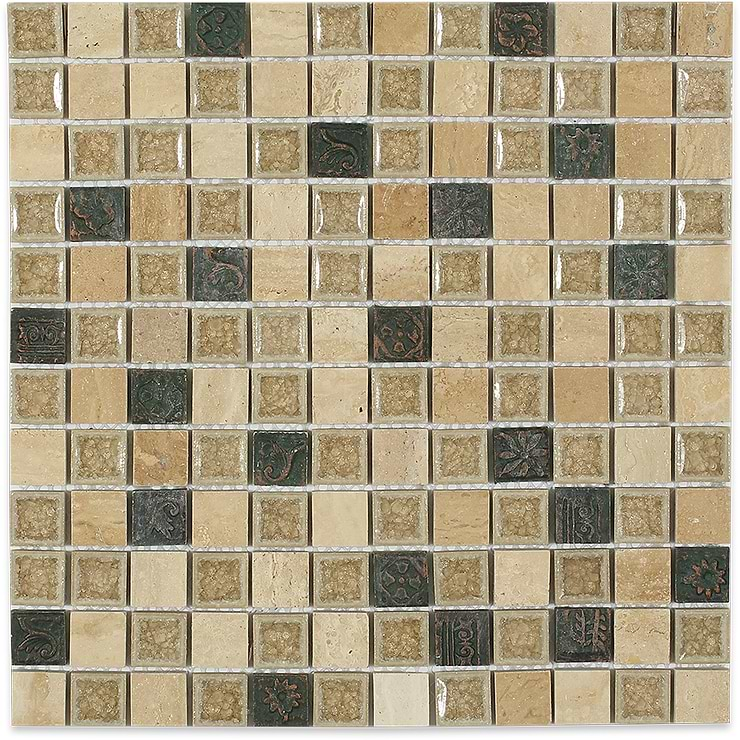
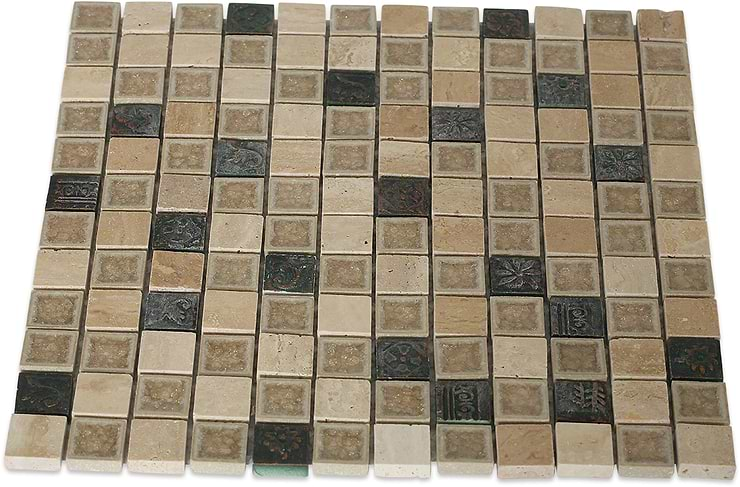
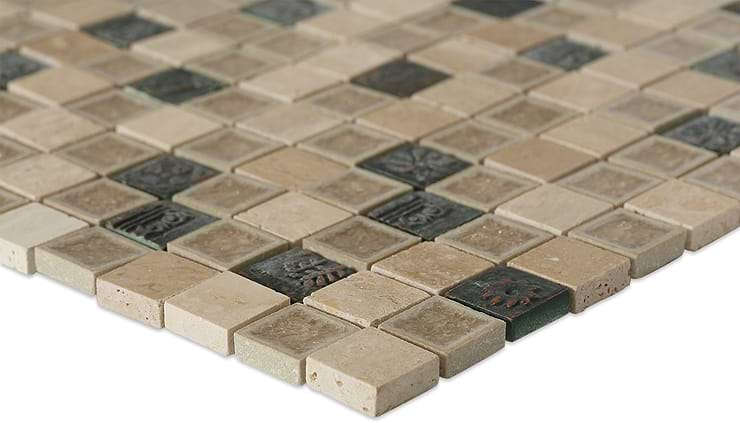
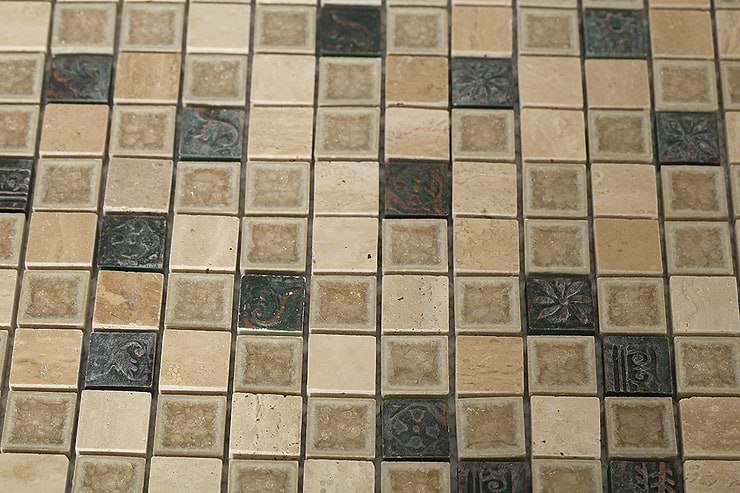
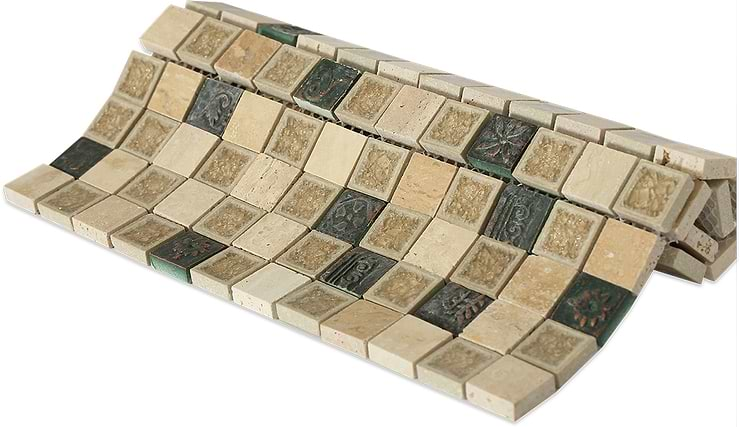
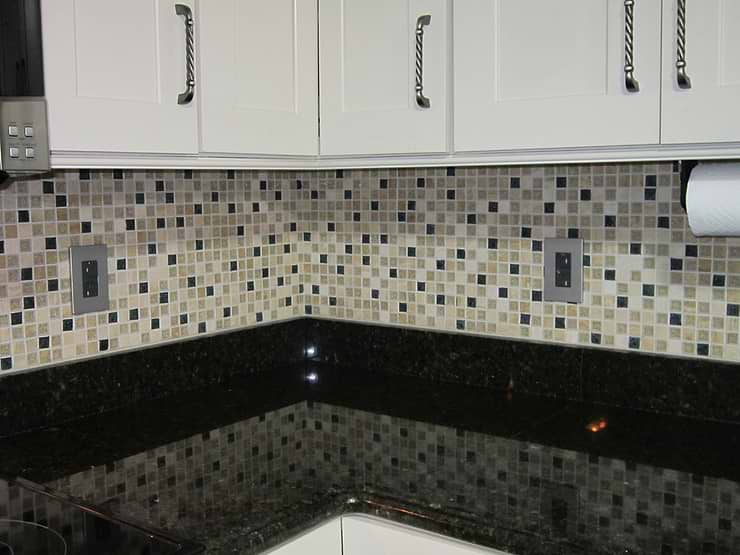
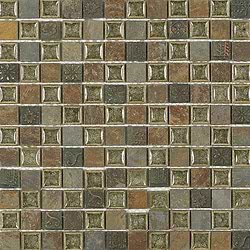
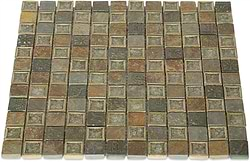
Roman Collection Desert Tan W/ Deco 1x1 Glass Tile
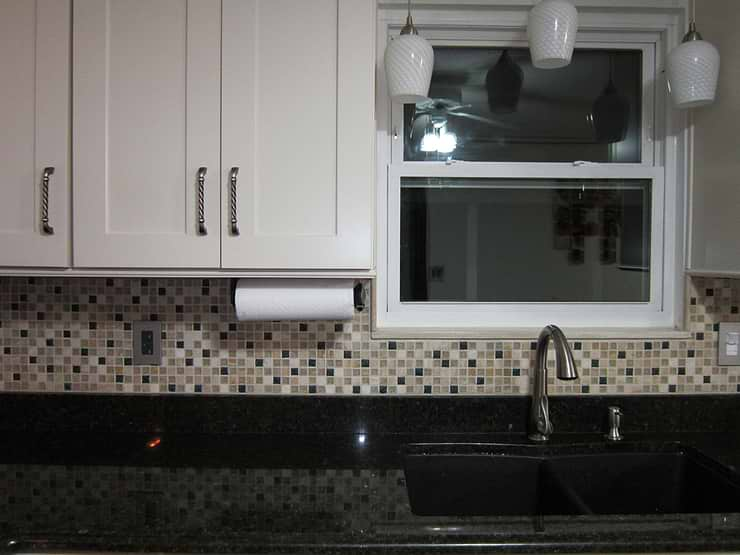
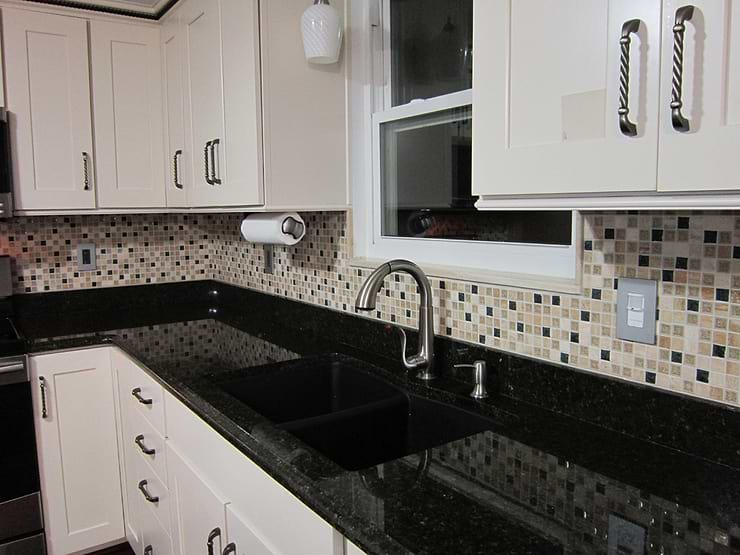
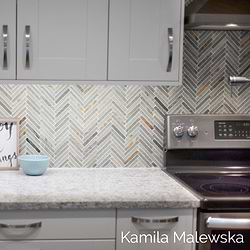
These gorgeous mosaics are composed of rich Travertine marble, resin decos and crushed glass. Each glass chip is hand pressed and then hand filled with colored crushed glass chips to create an intensely faceted surface that will capture and reflect light, making it look like thousand tiny glimmering diamonds. Great to use a backsplash; as well as an accent wall for your bathroom or any decorated spot in your home.
Key Specs
-
Chip Size
1" x 1"
-
Commercial
Wall Only
-
Item Color
Cream + Travertine
-
Material
Travertine
-
Residential
Wall Only
-
Tile Finish
Polished
Details
-
Available Sizes
1x1", 1x2", Mosaic
-
Coverage
0.96
-
Location
Backsplash, Indoor, Kitchen
-
Look
Decorative Look
-
Pattern Shape
Square
-
Sample Size
AVG size 2.93" x 5.87"
-
Size
11.75" x 11.75"
-
Stone Type
Travertine
-
Style
Craftsman, Industrial, Rustic
-
Thickness
8 mm
-
Tile Use
Backsplash
-
Weight
3.3 lbs
GLASS TILE CHARACTERISTICS
This material is made of clear and transparent glass. The back of the glass tile is coated with the desired pigment(s) and a white protective coating visible from the back of the tile. The multi-layered protective coating is fired with the tile and ensures that the thin-set mortars will not be visible after installation. The pigments and glass are made from natural minerals and as such the firing process will cause slight variations in shades and size. All material is sorted according to ANSI standard A137 size tolerances and packaging is clearly marked with caliber and shade/tone/dye-lot.
GLASS INSTALLATION INSTRUCTIONS
- These instructions are meant to be a guide for most installations, under normal conditions. Please follow best practice instructions found in the Tile Council of North America (TCNA) 09300 Handbook for specific installation types.
- We always recommend dry-fitting your pattern first to think about your cuts in advance and to make sure you like the pattern. This will also help you choose which pieces go where, which is especially helpful with tiles that have a lot of variation. Due to the nature of the material and production process it may be possible to see through the clear glass on certain angles which can appear as a lighter line along the edges of the glass. This is not a factory defect or deficiency of any kind in the material and should be expected by the end consumer. *Always use appropriate personal protective safety equipment when handling, drilling, cutting or grinding glass tile such as (but not limited to) eye, ear and hand protection.
- Before you start tiling, make sure that whatever surface the tiles are being installed to will be strong and structurally sound. Cement board, concrete or drywall is best, as these surfaces can handle the moisture of the tiling process. Plywood should be avoided, since the wood will warp with the added moisture and it will also be less waterproof, even after tiling.
- To avoid affecting the color of the tile, white thinset such as Bostik PM is strongly recommended for all installations.
- Apply as much adhesive as can be covered within 10-15 minutes.
- It is recommended to use grout release, then grout the tile, then use a sealant to the tile such as MP90 Non-sanded grout that is latex or polymer modified and compliant with A118.4 should be used for our glass material. If sanded grout must be used for technical or aesthetic reasons (such as with mosaics with larger grout joints), gentle application of grout with a soft rubber float is recommended to minimize the possibility of surface scratching. A mock up or testing installation should be executed to ensure results are acceptable.
- Highly recommended to purchase the Glass Installation/Maintenance Kit, which contains all you need to maintain and care for your tiles. . For normal care and maintenance of glass tile, wiping the surface with a damp sponge or clothe with water or a light vinegar solution is sufficient. If stronger cleaning is needed, a nonabrasive, neutral pH cleaner can be used.
MATERIAL INSPECTION
SUBSTRATE
INSTALLATION MATERIALS
Thin-Set
Tools
3/16" or 1/4" square notch trowel should be used when installing our glass material and ridges should be smoothed down with the flat side of the trowel prior to fixing the tiles in the mortar bed. Tiles larger than 3x3 should be back-buttered with a thin continuous layer of the thin set applied with the flat side of the trowel.
Drying Time
Glass tiles are non-porous: the moisture in the setting materials cannot migrate through the glass and must evaporate slowly through the joints. All setting material, even rapidest mortars need a longer time to cure. Allow thin-set mortar to dry completely for a minimum of 72 hours prior to grouting or otherwise interfering with the fresh installation.
Cutting
Use a glasscutter (score and snap) with a new diamond wheel for best results when cutting our glass tiles. Wetting the diamond wheel with oil before cutting will produce the smoothest cuts. In some cases it may be possible to use a wet-saw with a new, continuous rim diamond blade specifically designed for cutting glass. Do not use turbo or other notched blades designed for use with porcelain or ceramic as the teeth can cause a coarse cut, resulting in a heavily chipped edge.
To cut angles without a wet saw or grinder, drill a small hole at the apex of the angle prior to cutting. In most cases, this will allow the use of a score and snap cutter and avoid small cracks that can happen at the angle.
Cut edges and corners will be sharp. Always be sure to smooth the cut edges manually with a diamond hand pad or ceramic dressing stone.
Drilling
If possible, drill holes before installing tile. Drilling from both sides can ensure a cleaner finish if the hole will be visible after installation. Using a new diamond coring bit (for large holes) or spade bit (for small holes) with a diamond tip made for glass drilling will give the best results. Lubricating the bit and tile surface with a continuous spray of oil/water mix will prolong the life of bits and provide a better-finished edge. When possible, the use of a jig will ensure precise placement of holes to be drilled.
When drilling holes for anchoring bolts, plumbing or any other dissimilar material always ensure a minimum of 1/8" clearance around the item is provided to avoid cracking due to disparate expansion and contraction rates or stress transfer.
GROUTING
After grouting, wipe of excess surface grout with a slightly damp sponge - do not over wash. After initial wash has been allowed to haze, wipe once with minimal pressure at a 45-degree angle to joints and rinse sponge after wiping once with each side. Any remaining haze can be buffed off with a dry towel or cheesecloth after grout surface has dried sufficiently. Grout joints should be a minimum of 1/16” and not butt set. Clean excess grout as the work progresses before it has hardened completely. In the event that a grout haze forms, you can use an acid-free remover such as Deterdek to remove it. Acids should never be used for cleaning grout haze.
CARE AND MAINTENANCE
Glass tile may be damaged from impact with hard or heavy objects, which can lead to chipping or breakage causing sharp cutting edges that can lead to injuries. Always replace any damaged glass tiles immediately.
Shop This Collection
-
$15.99 $15.99
-
$16.99 $12.91
-
$8.99 $8.99
-
$8.99 $8.81
-
$8.99 $8.63
-
$8.96 $8.60
-
$7.99 $7.67
Recommended for You
-
$12.99 $14.03
-
$8.96 $8.60
-
$12.99 $441.66